Installation of Wall Signs with Visible Stand-off Fixings
Wall Mounting Signs with Visible Stand Off-Fixings - How they work, Pros & Cons & Installation Guide
Visible stand-off sign fixings are a very popular choice for sign installation. The stand-offs allow your sign to stand away from the wall and introduce a certain level of professionalism to the sign installation.
What are Visible Stand-Off Fixings?
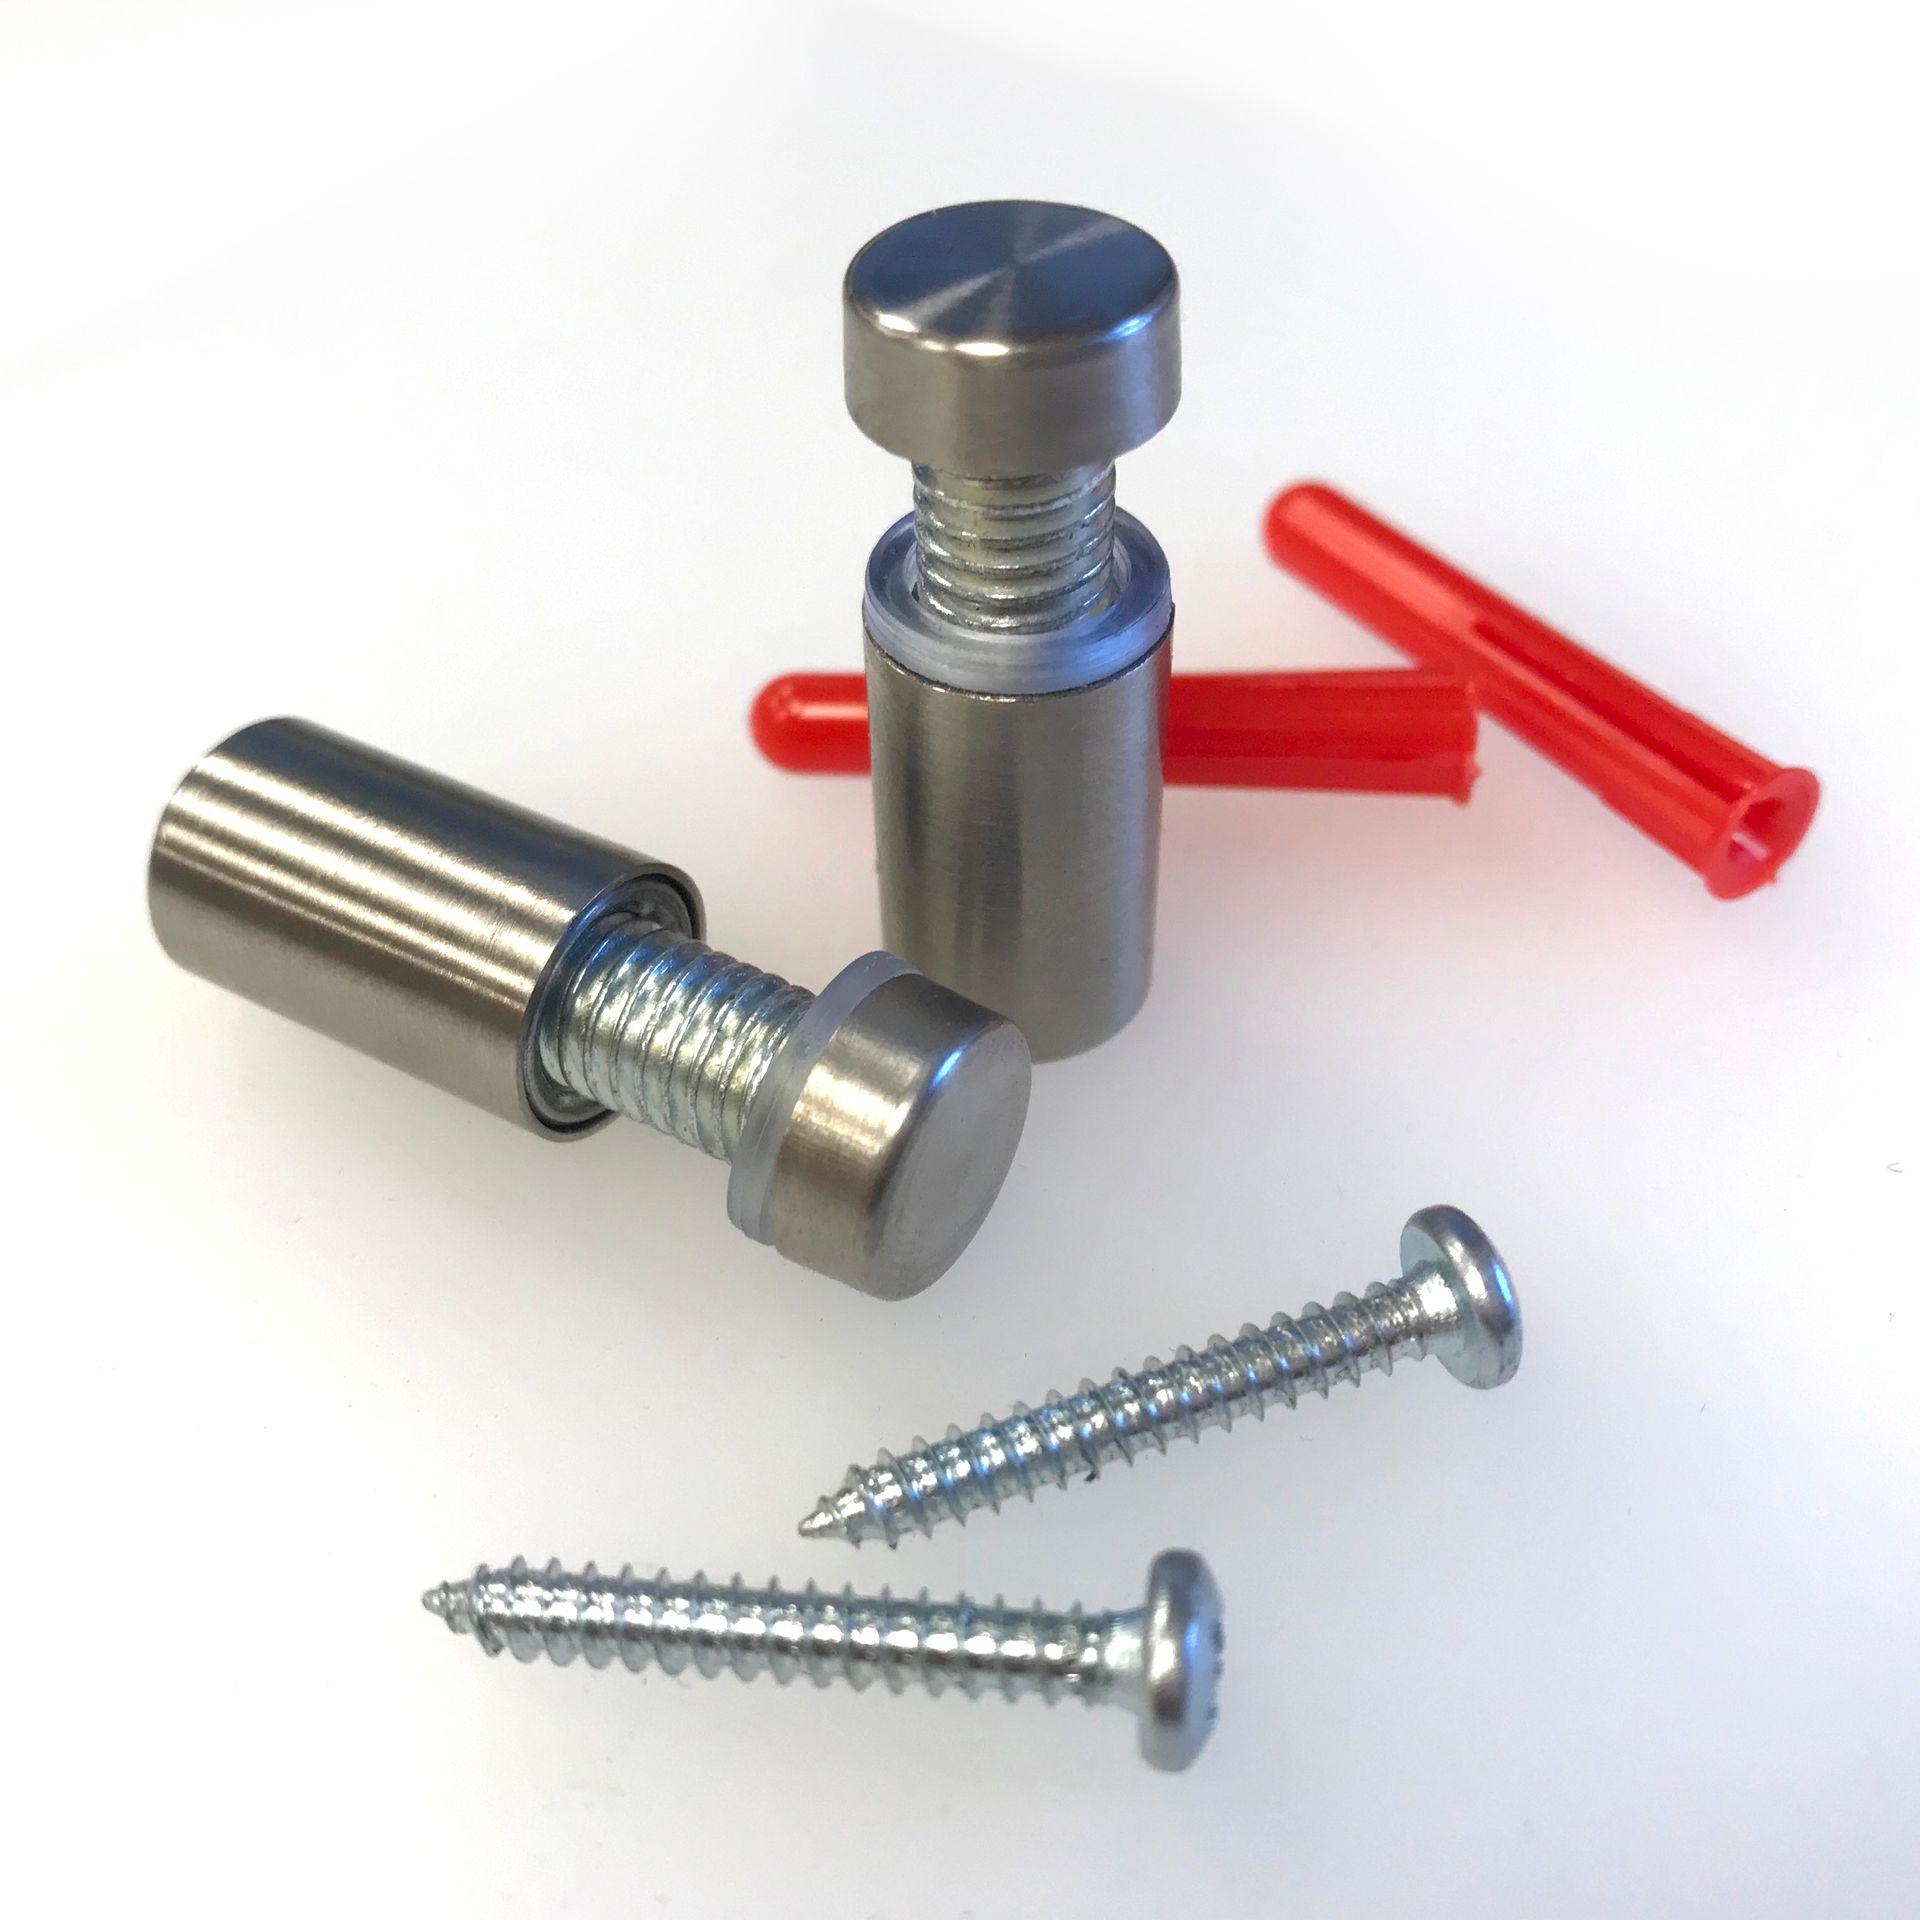
Visible stand-off sign fixings are cleverly designed type of mechanical sign fixing that allows your sign to stand away from the mounting surface.
They are referred to as 'visible', as after installation the cap of the fixings will be observable to the viewer and it is clear that they are fixed by mechanical means and they form part of the overall aesthetics of the sign. Some stand-off fixings are designed to be hidden behind the sign giving an impression the the sign is floating these fittings will be referred to as 'Hidden'.
The visible stand-off fixings themselves are generally available in a range of colours and finishes, to suit each signs aesthetic and the sign is designed in conjunction with the fixings. Having said this, stainless-steel or chrome are by far the most popular finishes.
Pros & Cons of Visible Sign Stand- offs
| Advantages | Limitations |
|---|---|
| Simple 20 minute installation | Basic DIY Skills Required for Installation |
| Suitable for most hard surfaces | Surface needs to be capable of holding screws |
| Suitable for exterior use | Sign needs holes to accommodate fixings |
| Good for most textured Surfaces | Fixings reduce space on sign surface slightly |
| Possible option for non stick surfaces |
Guide for sign installation using visible stand- off fixings
If you choose visible stand-offs as your installation method for your sign, the sign will come pre-prepared with holes to allow for easier installation. The number of holes will depend on the design of the sign you have chosen.
For installation you will need a drill with 5.5mm bit, a posi-drive screwdriver, a spirit level and a pencil to mark your drill holes.
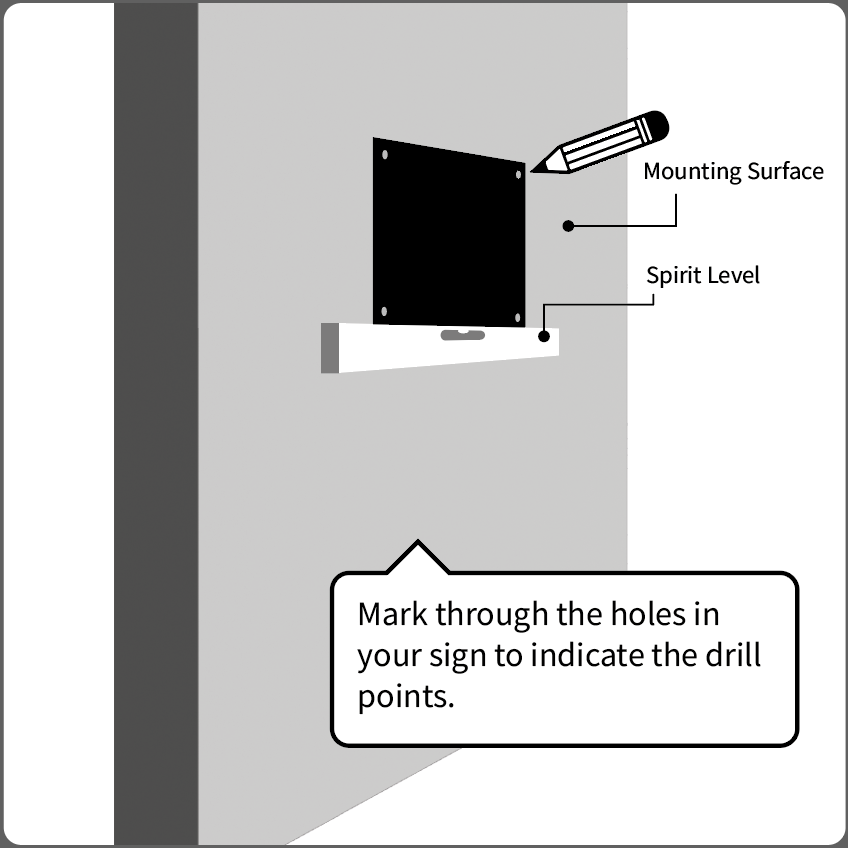
- Hold the spirit level to the surface on which you wish to mount your sign, at the height you would wish the bottom of the sign to sit. Make sure it is level.
- Rest and hold the sign with holes on the spirit level against the mounting surface. Hold the sign absolutely still and remove the spirit level. Mark through the sign holes with your pencil to indicate the centre of the holes, these will be your drill points.
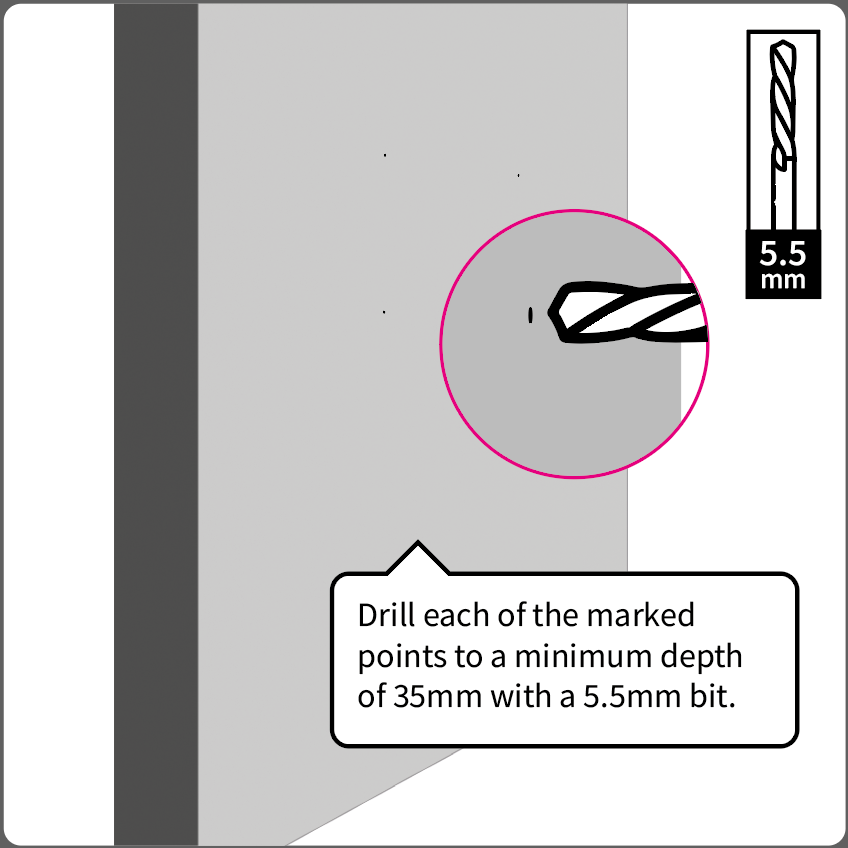
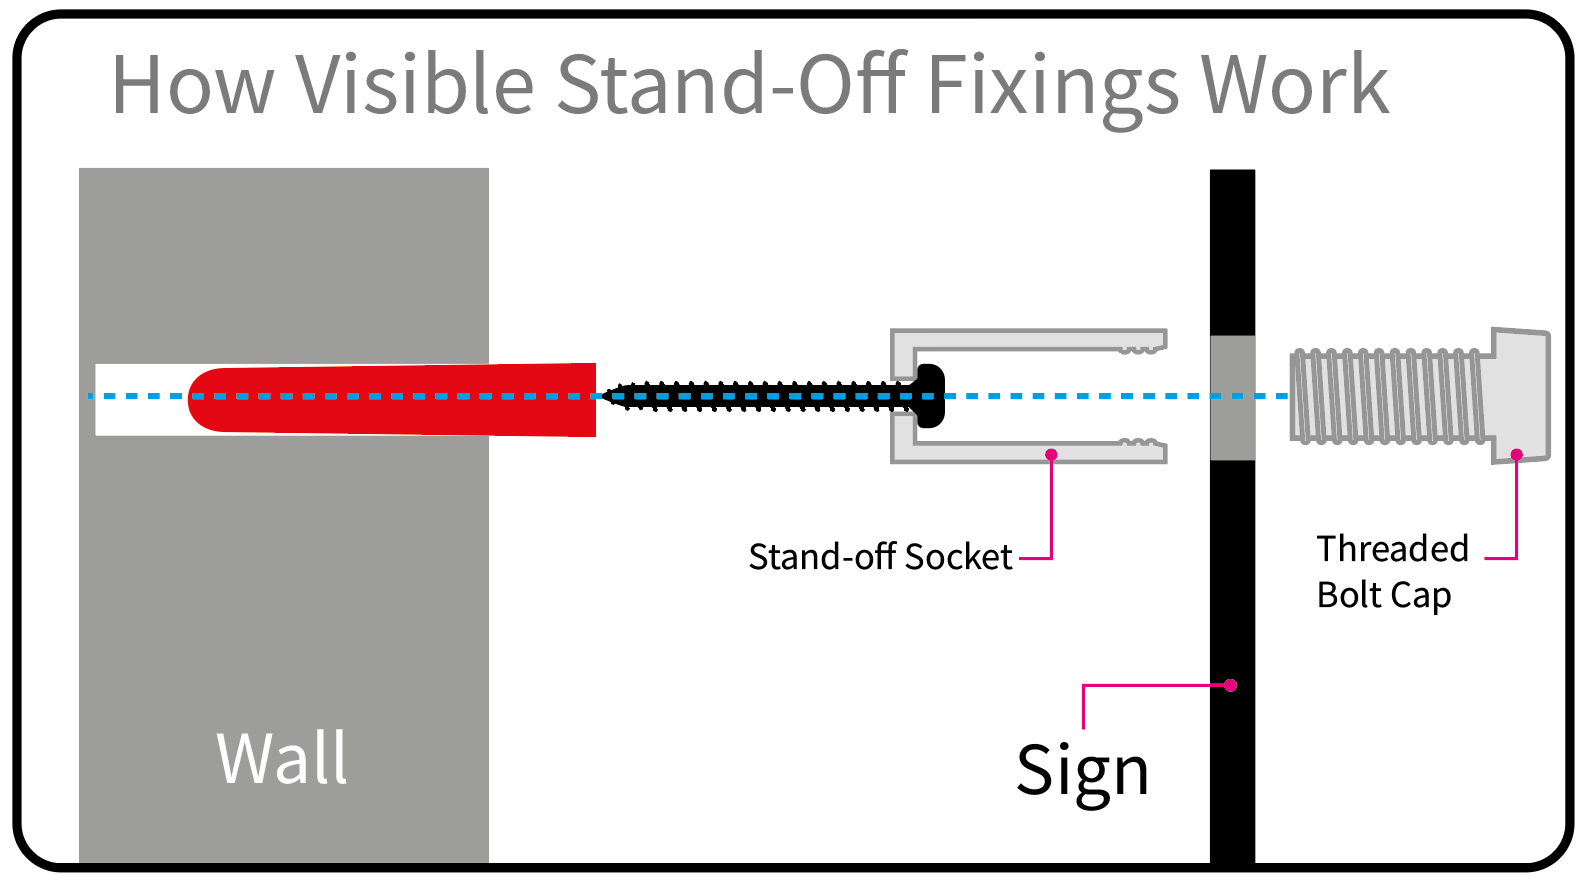
- Drill each of the points you've marked with a 5.5mm drill bit to a minimum depth of 35mm. Insert an expansion plug into each of the holes.
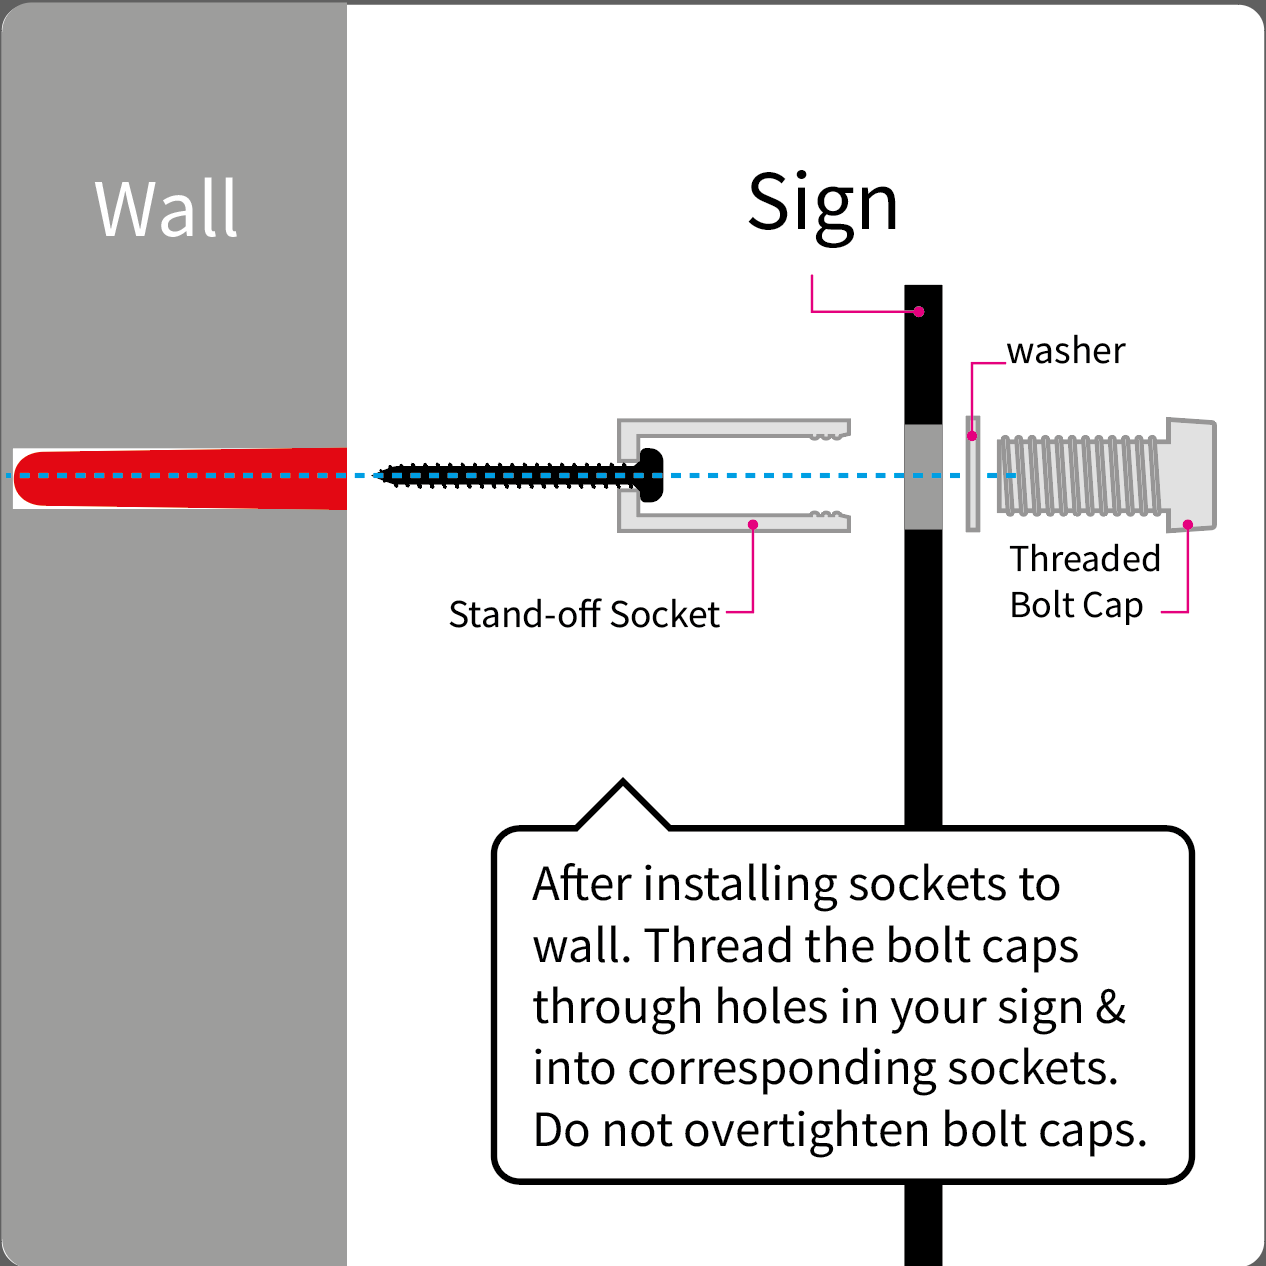
- Thread a screw through each of the sockets and proceed to screw them in to the installed expansion plugs.
- Hold your sign against the installed sockets and align the sockets with the holes in your sign. Rotate a threaded bolt cap into the threaded socket through each of the sign holes. The sign caps only need to be hand-tight, do not over tighten, this may damage your sign.
Note:
These instructions are a guide for sign installation on masonry surfaces, for other types of surfaces these instructions may need to be adjusted to suit your wall type. If installing on wood surfaces, the expansion plugs will not be needed.
